You wanna know what’s really good sometimes? Roasted chicken. You wanna know what is absolutely shitty and terrible sometimes? Roasted chicken. Listen, I get it, chicken excites literally nobody. Well, maybe Chick-fil-a, but that’s not the point. Let’s face it, most chicken is boring, milquetoast garbage.
This chicken, though. This chicken is my jam, y’all.

I originally got turned onto this recipe by my sister-in-law and her fiancé. As is standard operating procedure around here, they came over one Saturday evening for some nosh, wine, and dinner. Ok, so it was mostly for wine, whatever, whatever. Anyway, we typically trade turns on who makes dinner, and they were up this time.
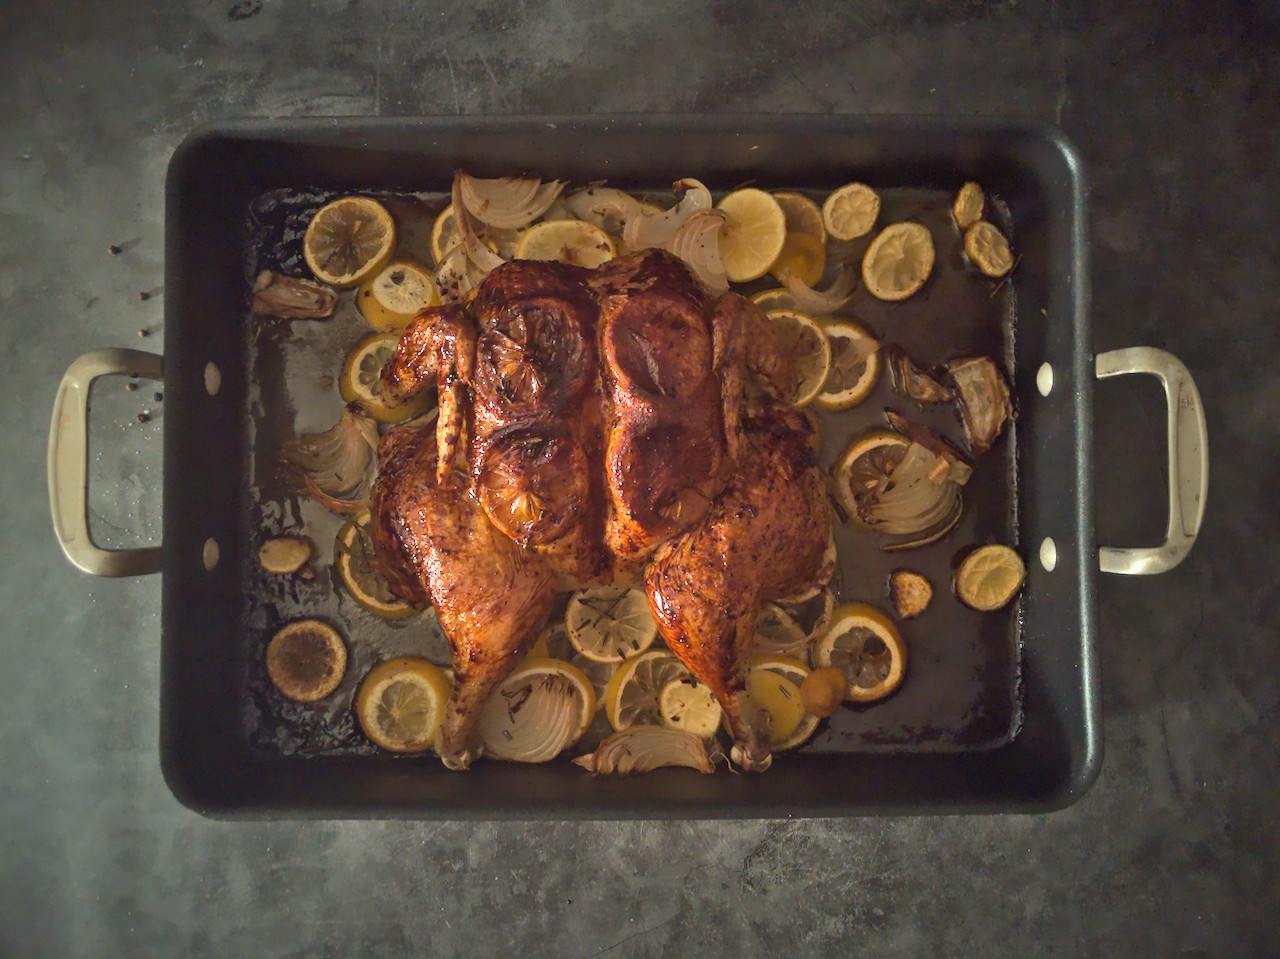
They put together this amazing combination of chicken, lemon, and herbs and roasted that bad boy to mouth watering perfection. Juicy, lemony.. let me tell you, it was fantastic and I was hooked. And here’s the kicker: they roasted it in a way that I’ve never really thought to roast a chicken before: they spatchcocked it.
What in the absolute hell is spatchcocking you ask? It’s simple: using kitchen shears, remove the backbone from a whole raw chicken and splay it out so it lays flat. Just a clean line on either side of the backbone until you’re left with the chicken sans spine. So why go to all the trouble? Spatchcocking is a great way to cut down on cooking time while also getting a nice even browning across the entire chicken. It makes for really attractive plating, trust me.
Anyway, back to business: I had to find some time to make this recipe for myself. Yes, I realize it would be both cheaper and easier to just grab a Publix deli rotisserie chicken, but when’s the last time someone said “dude, you wouldn’t believe this Publix chicken I had last night”. Ok, who am I kidding? Probably tons of people say that, Publix deli is amazing. But we’re talking about some DIY stuff here, not grab and go deli food, no matter how delicious it might be.
Right, so real talk: the secret to making absolutely stellar chicken is a brine. After my first experiment with brining chicken, I’ll never not brine a chicken, turkey, or maybe any bird ever again. And it’s super easy to do and doesn’t take a ton of time, just a couple hours before dinner prep is all you really need to get oh so delicious juicy and flavorful chicken instead of a concoction that will make you hear the losing sound from The Price is Right every time you take a bite.

To make a brine, you’ll need a couple basic things: salt and water. After that you can get pretty creative, depending on the taste that you want to achieve. For me, I have a pretty standard formula: kosher salt, whole peppercorns, bay leaves, onions, apples, oranges, garlic, and some brown sugar. I’ll also add a bit of chicken base just to boost the flavor a bit. Hell, I’ll toss some celery in there too if I’ve got some sad looking stalks just vibing in the vegetable drawer in our fridge.
There’s really no right or wrong way to do this; I always end up winging it most of the time until it tastes like I want it to taste, which is like a watery, salty soup that has the flavor of the oranges, apples, and other ingredients. And when I say salty, I mean salty. Just because your brine is saltier than you might like your food to be doesn’t mean that the chicken will be that inedible. Instead, what you’ll end up with is perfectly seasoned chicken. I won’t get into the details, but it’s science, go look it up.
I know it sounds like a pain in the ass to do, but trust me, the effort will pay off in dividends. I promise.
Another thing to remember is that a lot of whole raw chickens will come with giblets. Now, I get it that not everyone is a fan of chicken livers, but don’t throw all that away! And definitely not the chicken backbone you remove when spatchcocking! Instead, save those so you can cook them down with any chicken bones to make a delicious stock that you can freeze and keep on hand for what Annie and I like to refer to as ’emergency weeknight soup’, which is just a fancy term for not having a dinner plan and needing to get something on the table fast lest we face the wrath of a hangry four year old.
With any chicken recipe, cooking is as important as any of the prep and seasoning work (if not more so, in my opinion). You’ll want to cook your chicken to temp, accounting for carryover cooking (i.e. residual heat that continues to cook the chicken after you remove it from the oven). This is a crucial part in making chicken that doesn’t suck. Sure, a lot of chicken or turkey labels might say “cook X minutes per pound” but don’t even bother trying that. Instead, invest in a meat thermometer and cook your chicken until doneness; I’ll cook to an internal temperature of 160 degrees Fahrenheit, then let the chicken rest to account for any carryover cooking.
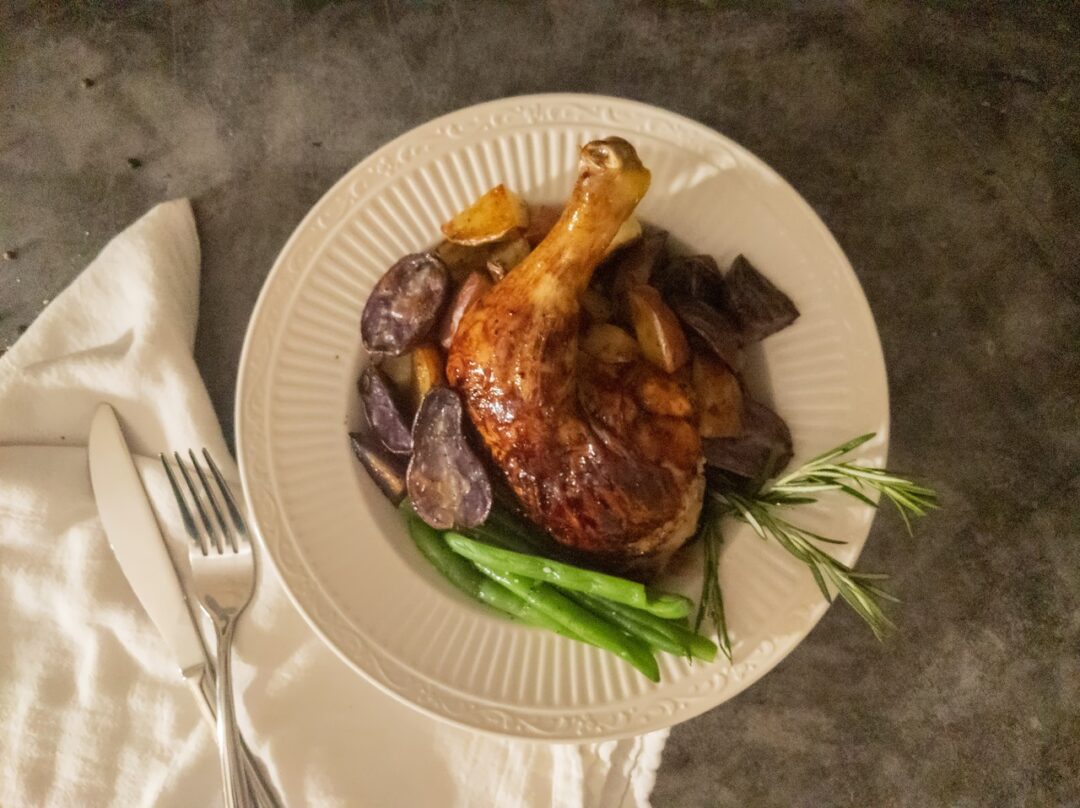
Once you’re done, slice up your beautiful, golden roasted chicken and serve next to your favorite hearty starch and vegetable side. For us, we like roasted fingerling potatoes and fresh green beans, but you can really do anything that you like or might have in the pantry or refrigerator.
Lemony Spatchcocked Chicken
Ingredients
- 1 whole chicken
- 5-6 lemons (sliced)
- ½ onion (sliced)
- 1 tbsp chopped rosemary
- pinch salt and pepper
Brine
- 4 quarts water
- f tbsp kosher salt
- 1 tbsp whole black peppercorns
- 2 bay leaves
- 3 cloves garlic (minced)
- 2 onions (quartered)
- 2 small apples (quartered)
- 2 small mandarin oranges (squeezed and quartered)
Directions
Brining the Chicken
- Add about 3.5 or 4 quarts of water into a 5 quart stock pot.
- Add all of the brine ingredients to the water and mix until combined. Note: you may need to tweak this based on how it tastes to you.
- Place the whole raw chicken, removing any giblets, into the brine solution until it is completely submerged.
- Add a few cups full of ice to the stock pot, cover, and store in the fridge for 2-4 hours.
Cooking the Chicken
- Preheat oven to 425 degrees
- Slice about 5 or 6 lemons and arrange them into a layer in a roasting pan or on a cooking sheet, setting aside 3 or 4 slices for later.
- Slice onion and scatter across the bed of lemons
- Remove the chicken from the brine, which can be discarded
- Using kitchen shears, remove the chicken backbone by make two clean cuts on either side. Set this aside for use later if you wish to use it to make chicken stock (highly recommend).
- Place the bottom of your palms on the chicken breast and, grabbing the back side of the chicken, splay the chicken out so that it will lay flat.
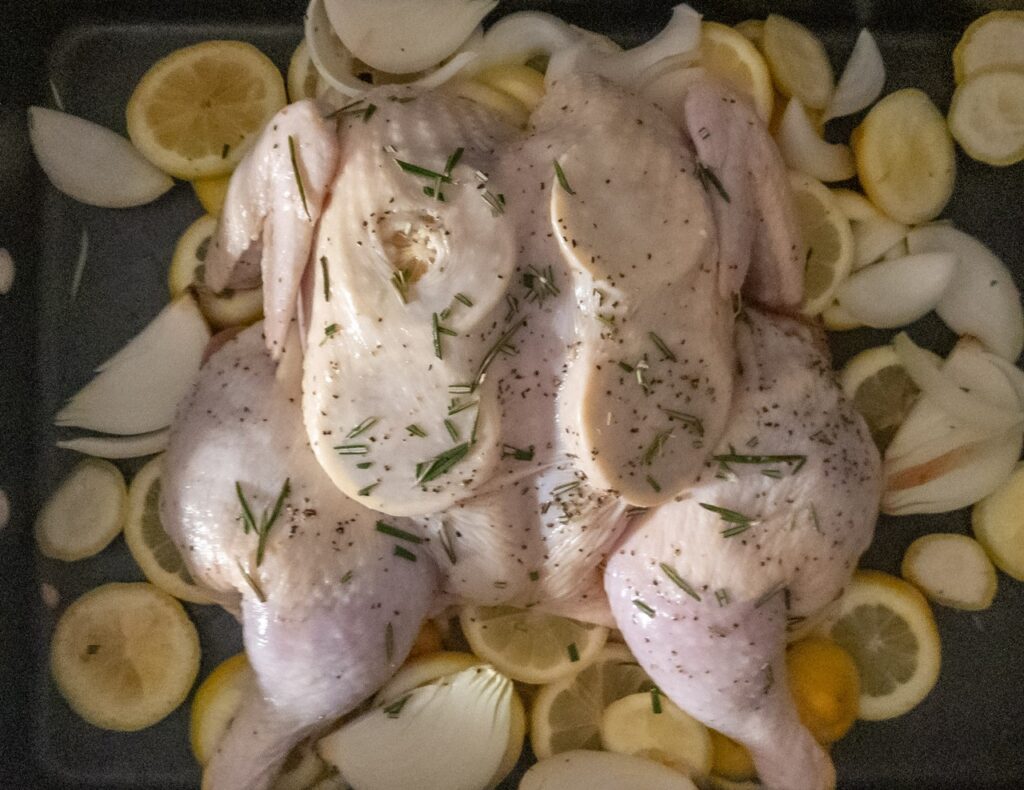
- Season the outside of the chicken with a pinch of salt, a pinch of pepper, and chopped rosemary, then place the chicken breast side up on top of the bed of lemon slices.
- Using your fingers, separate the chicken skin from the breast meat so that becomes almost like a pocket. To this add the 3 or 4 lemon slices that you set aside in a previous step. Optional: if you also want to add a couple small pats of butter under the skin (I do this with turkey), don't let me tell you not to. I mean, it's butter.
- Place into the oven on the middle rack and roast for approximately 45-60 minutes, or until the internal temperature reaches 160 degrees.
- Remove the chicken from the oven and let rest for 5-10 minutes.
- Carve and serve!


No Comments